Friday, October 28, 2011

Candy Corn Cupcakes

Candy Corn Cupcakes

These cupcakes were inspired by the girls over at Our Best Bites and they are a super easy and fun treat to make! I made a batch today, and since I was in a hurry, I "cheated" and made them straight from a boxed mix and used a can of frosting. *gasp*

You will need the following ingredients: Yellow cake mix (plus ingredients to make), cupcake liners, yellow and orange food coloring, frosting, and candy corn.

Start by mixing your cake mix according to the directions, then divide the batter evenly (which I also failed to do) into two separate bowls. Using your food coloring, add enough to make one bowl yellow and the other bowl orange. Also, try and use orange food coloring instead of mixing red and yellow (which I did for these) because it turns out kind of blah instead of bright.


Next you want to scoop the yellow batter into the cupcake liners filling them all evenly. Now, the first "helpful" thing my husband did for me today was agree that candy corn colors go orange, yellow, then white. However, in his defense, if I hadn't been too lazy to walk into the other room to actually get the candy corn and look for myself, I wouldn't have had this problem. So... My cupcakes were a little out of order color-wise!

Here is my pan with the first layer of batter in it... If you are doing it correctly though, yours will be yellow. Next, you want to add your orange batter on top. Now, as you can see in the picture, I didn't divide my batter very evenly when I colored it, so I had way more orange than yellow, which resulted in the orange peeking out from the sides.


Bake your cupcakes according to the directions. I always set my timer for the lowest suggested time and check them until they are done to avoid overcooking them.

When you pull them out, this is what they will look like (only with colors reversed). If you did a better job dividing your batter than I did, you won't have the color bleed through on top like mine did. Also, you won't have a row of sad plain orange cupcakes!


When you open the cupcake up it has fun layers inside!


The idea behind these cupcakes is that they are supposed to look like candy corn. They will have layers of yellow, orange, and the white tip is the white frosting you add to the top. Simply frost the tops and stick a couple of candy corn in it. So easy!


Oh, and the second "helpful" thing my husband did for me was eat my "model" cupcake I had picked out... After I specifically told him, "you can eat a cupcake, but not this one with the candy corn on top". He said he "misunderstood". I think it just looked the most delicious!

Sunday, October 9, 2011

Pumpkin Patch Fun!

I'm still trying to figure out what direction I want this blog to be going... Should it be less personal and filled with all my (hopefully) great ideas, or should it be a big jumbled mix of everything? I guess if it's going to truly be my blog, it will be a reflection of myself. So brace yourself for some random craziness!

One of my favorite things to do in the fall is visit the pumpkin patch. I could care less about Halloween, but I LOVE pumpkins! The last couple of years we visited a cute little pumpkin patch in Woodland, WA called The Patch. It's a small family owned business and we always came home with a TRUNK-FULL of pumpkins. They have an amazing variety and you aren't stuck fighting big crowds.

My little Pumpkin's first visit to the pumpkin patch 2010


This year I wanted to find a pumpkin patch with more activities since Jenna is older (19 months) and we didn't have to push her stroller through a maze of pumpkins this year because she can walk! On the recommendation of a friend, we tried out a pumpkin patch in Vancouver, WA called Bi-Zi Farms and it was so much fun!

The Corn Bin

Hay Maze - Jenna found a little friend to get lost with... I'm pretty sure she just wanted her kitty boots though!

Petting Zoo
There were a lot of activities that younger kids could really enjoy... And of course, stuff for the big kids too!

Cory trying his skills at the pumpkin launch

They have an area where you can watch them press apple cider and then of course, taste it! You also get to try your hand at shelling & grinding corn. When you are finished, you can take it to the animal area and feed it to the chickens or turkeys!

Shelling the corn

Grinding the corn
Speaking of corn... If you decide to do the corn maze, keep in mind that it is rather large. You may want to make sure you don't drink a bunch of water and wait until you are only a third of the way through before realizing they don't have conveniently placed bathrooms in the middle of the maze. Not that I'm speaking from experience or anything... I also found out that 19 month old children find that it's very important to touch every corn leaf and say "corn" as they pass by. Let's just say I ended up awkwardly carrying Jenna in my arms so that her boots didn't get mud all over me and ran through the maze with Cory behind me with the map shouting out directions. We must have been quite a sight!

Corn Maze
We saved the pumpkin patch for very last and by the time we got there, we were getting pretty tired! To get to the pumpkin patch you can decide to walk (BORING!) or take a ride on one of the hay wagons. Because we went on a Saturday with beautiful weather, it was pretty busy by the time we were ready to go on our hayride. Don't let the long line fool you though, they have several tractors running at once and we didn't have to wait long at all!

The Pumpkin Patch

Jenna picking out her pumpkin

Admission is $8 per person (kids under 2 are free) and that included one free pumpkin (any size!),  hay ride, corn maze, corn bin, petting zoo, duck races , two tries at the pumpkin launch , straw bale maze, straw bale pyramid , corn shelling & grinding, and 1 free hot drink (hot chocolate, hot spiced cider, or coffee).

Disclaimer: I'm just sharing our pumpkin experiences... I have been in no way reimbursed for sharing this information, I just want you to have the opportunity for fun too!

Thursday, September 15, 2011

Re-fashioning - The PC term for being cheap!

A few months ago I went to the Goodwill outlet store and spent over an hour digging through piles and piles of clothes. For anyone who has not yet had the pleasure of visiting a Goodwill outlet store, it's a little bit like dumpster diving. They pile clothes in these big garbage-like bins on wheels and they are not sorted and NOT cleaned (I use mega-heavy-duty rubber gloves). The reason I love this place though is you pay for clothes by the pound so it's super cheap!

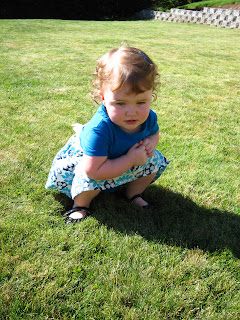
Okay, getting to the point of the story... while I was there I found a t-shirt for myself, and after I got home and washed it (several) times in (scalding) hot water, I found out that it was just plain ugly on me. I decided it would be perfect to practice my "re-fashioning" skills. I guess that really sounds better than saying "I took an old t-shirt and made some clothes for my baby because I'm too cheap to buy her clothes at the store".

I used the t-shirt from the thrift-store and picked up some cheap fabric for the skirt. This dress cost less than $4 to make and I even had enough t-shirt material left over to make a pair of legging shorts for her to wear under the dress! Perfect for times like these...


And wearing shorts under dresses comes in handy when you need to spontaneously climb a wall in sparkle shoes!


I am far from being an expert seamstress (as in, it took quite some time before I realized I was having issues sewing today because I was using a broken needle), but this dress was super easy to make. Head on over to This Mama Makes Stuff for a great tutorial on how to make a t-shirt dress and Make it and Love it has a simple tutorial on making your own leggings!

Thursday, August 25, 2011

Chocolate Peanut Butter Cupcakes

How fitting that for my first blog post, I decide to blog about something that I only took one picture of - with my cell phone as I was stopped at a red light. Oh well. I've got to take the plunge into the land of bloggers sometime so it might as well be now!

This morning I decided I needed to make something to take to my husband and all his work buddies. It needed to be quick, easy, and absolutely delicious. So... Cupcakes it is!

Since I needed to have these done and delivered before naptime, I decided to go the easy route and use a cake mix. Yeah... who am I kidding? It's a rare occasion when I DON'T use a cake mix! I used the Duncan Hines Devil's food cake and I highly recommend it over other brands. My cupcakes were very moist and delicious. (No, I'm not getting paid to advertise, it's just the truth!)

I decided to try out the peanut butter frosting from my favorite food blog How Sweet It Is, but as I was searching for some creamy peanut butter, I found an empty jar left in the cupboard from when I made monster cookies. I wasn't willing to give up though and decided to use chunky peanut butter instead. I really liked how it turned out and thought it somehow made the cupcakes seem even fancier.  So, I've adapted the recipe to the following:

Peanut Butter Buttercream:

1/2 cup butter, softened
2/3 cup chunky peanut butter
3 cups powdered sugar
1 teaspoon vanilla extract
2-3 tablespoons of milk

Cream butter and peanut butter together in the bowl of an electric mixer. Add powdered sugar with mixer on low speed and gradually add milk and vanilla extract. Mix until frosting is smooth. If too thick, add more milk; if too thin, add more sugar.


Now for anyone who wants to make a really easy and delicious dessert, I'm telling you. Make these cupcakes! They look fancy, but they were ridiculously easy. Here is what I did:


1. Bake some delicious devil's food cupcakes from a box mix following the directions exactly. Make sure you let them cool completely on a cooling rack before frosting them.

2. Mix up a batch of peanut butter buttercream. Put the frosting in a decorating bag or ziplock bag with the corner cut off and squeeze a blob of frosting on top of the cupcake.

3. Pull out some hot fudge ice cream topping from the fridge and heat it up in a ziplock bag (cut off the corner after heating). Then drizzle it out while crazily moving the bag over the cupcakes - resulting in a very messy kitchen counter and beautiful cupcakes!

4.Make sure to taste test at least one... or four or five cupcakes to make sure they turned out!